 ultimate-guide
How to Brew Specialty Coffee at Home: A 2026 Guide
Table of Contents
- What You'll Need to Brew Specialty Coffee at Home
- The Specialty Coffee Water-to-Coffee Ratio That Works
- Finding the Best Water Temperature for Coffee Brewing
- A Coffee Grind Size Chart for Different Methods
- Step-by-Step Guide to Your First Brew
- Best Coffee Brewing Methods for Beginners Compared
- Troubleshooting by Taste: Fixing Common Brewing Mistakes
- Conclusion: Your Daily Specialty Coffee Ritual
- Frequently Asked Questions
Last Updated: September 9, 2026
What You'll Need to Brew Specialty Coffee at Home
To brew specialty coffee at home means using freshly roasted, high-quality beans with precise control over water, grind, and time to highlight the bean's unique origin flavors. The gap between average and exceptional coffee comes down to a handful of tools and habits, not expensive machinery. At The Gilded Cafe' Co., we roast in small batches to ensure maximum flavor, aroma, and consistency in every cup.
The essential setup is smaller than you think: a burr grinder, a digital scale accurate to one gram, a temperature-controlled kettle, and a simple brewer. A common mistake is buying an expensive espresso machine before owning a decent grinder, since grind consistency matters more than machine cost.
The Specialty Coffee Water-to-Coffee Ratio That Works
The standard specialty coffee water-to-coffee ratio is 60 grams of coffee per 1,000 grams of water, or roughly 1:16.7. This ratio, endorsed by the Specialty Coffee Association brewing standards, produces a balanced cup with clear flavor definition suitable for most palates and brew methods.
Start here and adjust to taste: if the cup tastes thin, increase the coffee to 1:15; if heavy or cloying, back off toward 1:18. Weigh beans dry and water as it flows, since volume measurements are unreliable due to density variation between roasts.
Finding the Best Water Temperature for Coffee Brewing
The best water temperature for coffee brewing is between 195°F and 205°F, with 200°F as a reliable starting point for most light and medium roasts. Below 195°F under-extracts, leaving the cup sour and weak; above 205°F over-extracts, pulling harsh bitterness. But temperature is only half the story, the mineral content of your water determines whether those extractions actually taste good.
Why Water Chemistry Matters More Than Most Guides Admit
Specialty coffee is roughly 98% water, yet most guides treat water as a blank slate. Magnesium and calcium ions act as extraction catalysts: magnesium pulls out bright, fruity acids, while calcium contributes body and mouthfeel. If your water lacks both, even a perfect 200°F pour will produce a flat, hollow cup.
Most municipal tap water is either too hard (high in calcium carbonate, which buffers acidity and makes coffee taste chalky) or too soft (low in minerals, which under-extracts and leaves coffee sour and thin). The Specialty Coffee Association targets 50-175 ppm total dissolved solids, 40-75 ppm alkalinity, and 30-80 ppm hardness as calcium carbonate.
A Practical Home Water Fix Without Lab Equipment
You do not need a chemistry degree to fix your water. A carbon filter pitcher removes chlorine and chloramine while leaving beneficial minerals intact. If your water is very hard, dilute it with distilled water at a 1:1 ratio; if very soft, add a pinch of magnesium sulfate (Epsom salt) to a gallon of distilled water.
A simple test: brew the same coffee twice, once with tap water and once with filtered or adjusted water, keeping every other variable identical. The difference is rarely subtle, most describe the tap-water cup as "muddy" or "flat" and the adjusted-water cup as "clear" and "vibrant."
Temperature and Roast Profile: The Interaction Table
Temperature interacts with both roast profile and water chemistry. Darker roasts are more soluble, so they brew well at the cooler end near 195°F. Lighter roasts, which preserve more delicate acidity, benefit from the hotter end near 205°F. The table below summarizes the interaction:
| Roast Level | Starting Temperature | Why |
|---|---|---|
| Dark | 195°F | High solubility means excess heat extracts harsh, ashy bitterness |
| Medium | 198-200°F | Balanced extraction of acids and sugars |
| Light | 203-205°F | Dense bean structure requires more thermal energy to dissolve solubles |
If you lack a temperature-controlled kettle, bring water to a full boil and wait 30 to 45 seconds before pouring. Boiling time varies with altitude, so confirm with a kitchen thermometer rather than trusting a fixed wait time.
The Third Variable: Water-to-Coffee Contact Temperature
One subtlety most guides miss: the water in your kettle is not the temperature hitting the coffee bed. In a pour-over, water loses 5-10°F between kettle and slurry, depending on room temperature, pour height, and brewer material. A ceramic dripper absorbs more heat than glass or plastic, so it requires a hotter initial pour. If your brew finishes weak despite 200°F water, measure the slurry temperature with a probe thermometer; maintaining 195-198°F throughout produces the clearest flavor separation.
For immersion methods like the French press, preheating the vessel matters more than most guides acknowledge. A cold press can drop your water temperature by 15°F the moment you pour. Rinse your press with boiling water first, empty it, then add grounds and water, this single habit prevents more under-extraction problems than any other adjustment.
A Coffee Grind Size Chart for Different Methods
Grind size determines how quickly water extracts flavor compounds, so matching grind to brew time is the single highest-impact adjustment you can make. The chart below pairs each brewer with a texture reference rather than a numbered setting, since grinders vary widely.
| Brew Method | Grind Size | Texture Reference | Brew Time | Common Grinder Setting Range* |
|---|---|---|---|---|
| French Press | Coarse | Sea salt flakes | 4 minutes | 28-32 clicks on a Comandante; 8-10 on a Baratza Encore |
| Pour-over (V60) | Medium-fine | Sand | 2.5 to 3 minutes | 18-22 clicks on a Comandante; 14-18 on a Baratza Encore |
| Pour-over (flat bottom) | Medium-coarse | Sand | 3 to 4 minutes | 22-26 clicks on a Comandante; 18-20 on a Baratza Encore |
| Drip machine | Medium | Table salt | 4 to 6 minutes | 20-24 clicks on a Comandante; 18-20 on a Baratza Encore |
| AeroPress | Fine to medium | Table salt to sand | 1.5 to 2 minutes | 14-18 clicks on a Comandante; 12-16 on a Baratza Encore |
| Espresso | Fine | Powdered sugar | 25 to 30 seconds | 8-12 clicks on a Comandante; 8-12 on a Baratza Encore |
*These ranges are starting points. Grinder burrs wear differently, and bean density varies by origin and roast level, so always calibrate by taste rather than trusting a number.
How to Calibrate Your Grinder in Three Brews
If you just bought a new grinder or switched coffees, do not trust the manufacturer's suggested settings. Run a three-brew calibration sequence:
- Brew 1: Use the middle setting from the chart above. Taste the result.
- Brew 2: If the coffee is sour or weak (under-extracted), grind one full step finer. If it is bitter or drying (over-extracted), grind one full step coarser.
- Brew 3: Adjust again in half-steps based on Brew 2's result. Most grinders settle into their optimal setting within three brews.
This works because grind size affects extraction rate exponentially, not linearly. A one-step change on most burr grinders alters particle surface area by roughly 20-30%, enough to shift a cup from sour to balanced or from balanced to bitter.
The Particle Size Distribution Problem
No grinder produces uniform particles. The ratio of fines to boulders, called particle size distribution, determines how "muddy" or "clean" your cup tastes. Blade grinders produce an extreme spread, with some particles 10 times larger than others, which is why they produce bitter-and-sour cups simultaneously: fines over-extract while boulders under-extract.
Burr grinders produce a narrower distribution, but the spread still varies by quality. A $100 Timemore C2 is wider than a $300 Comandante C40, which is wider than a $900 Niche Zero. You do not need to spend $900 to brew excellent coffee, but understanding your grinder's limitations helps you adjust:
- Wide distribution grinders: Use a slightly coarser setting than the chart suggests and extend brew time slightly. This allows the larger particles to extract fully while preventing the fines from turning bitter.
- Narrow distribution grinders: Use the chart settings directly. The uniform particles extract at similar rates, producing cleaner, more defined flavors.
Diagnosing Grind Problems by Taste
Grind problems show up in predictable ways. The table below maps symptoms to causes:
| Symptom | Likely Grind Issue | Fix |
|---|---|---|
| Sour, sharp, mouth-puckering | Too coarse, water flows through too fast | Grind finer |
| Bitter, astringent, drying | Too fine, water channels or stalls | Grind coarser |
| Both sour and bitter simultaneously | Wide particle distribution (blade grinder or poor burr alignment) | Upgrade grinder or sift out fines |
| Weak, thin, hollow | Grind too coarse for the brew time | Grind finer and extend brew time |
| Muddy sediment in cup | Excessive fines or grind too fine | Grind coarser or use a paper filter |
Roast Level Changes Your Grind Setting
Darker roasts are more brittle and fracture into more fines during grinding, so they extract faster and taste more bitter at the same setting. When switching from light to dark, grind one step coarser; from dark to light, grind one step finer. This matters most for espresso and pour-over.
The Sifting Technique for Precision Brewing
For maximum clarity, a fine-mesh sieve (200-300 micron) can remove the smallest fines before brewing. This technique, borrowed from competitive baristas, reduces astringency and muddy mouthfeel. Sift only the fines, and add them back if you want more body. Sifting improves clarity noticeably in pour-over but makes little difference in immersion brewing.
Step-by-Step Guide to Your First Brew
Start with freshly roasted beans, ideally within two to four weeks of their roast date, and grind immediately before brewing. Coffee begins degassing and losing volatile aromatics within minutes of grinding, so pre-ground bags sacrifice the delicate compounds that define specialty coffee.
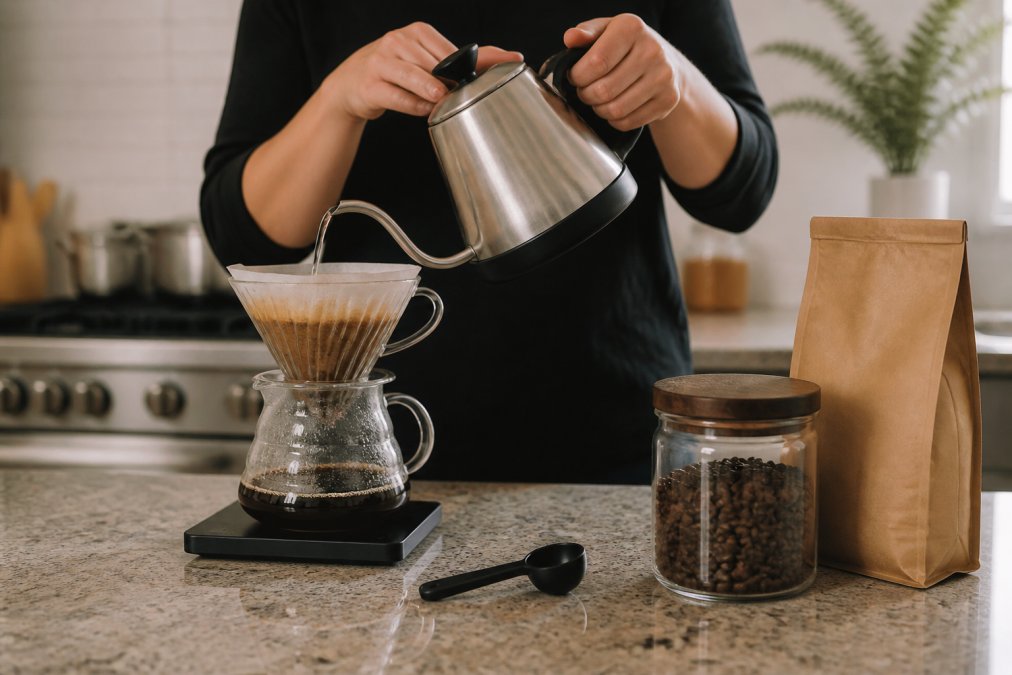
Weigh 30 grams of coffee and 500 grams of water for two cups. Bring water to 200°F and grind the beans to the correct size for your method. This total process takes about five minutes once your kettle is hot.
The Pour-Over Method
Place a paper filter in the dripper and rinse it with hot water to remove papery flavors and preheat the vessel. Add the grounds, then pour just enough water to saturate them evenly, about twice the coffee weight, and wait 30 seconds. This bloom phase releases trapped carbon dioxide so the subsequent extraction is even.
Pour the remaining water in slow, concentric circles, keeping the slurry temperature stable and the bed agitated. Aim to finish pouring by the 2.5-minute mark and let the water drain completely by three minutes. The result should have a clean, tea-like body with distinct tasting notes.
The Immersion Method (French Press)
Add coarse grounds to the press and pour all the water at once, stirring gently to ensure full saturation. Place the lid on without pressing the plunger and wait four minutes. Immersion extracts differently than pour-over because there is no bypass brewing, so every particle stays in contact with water for the full duration.
After four minutes, break the crust with a spoon, skim any floating grounds, and press the plunger slowly. Decant immediately, since the coffee continues extracting while sitting on the grounds and will turn bitter within minutes.
Best Coffee Brewing Methods for Beginners Compared
The best coffee brewing methods for beginners prioritize forgiveness over precision, producing drinkable coffee even when technique is imperfect. Immersion methods like the French press win here because they are less sensitive to pouring technique and grind inconsistencies than pour-over.
| Method | Difficulty | Equipment Cost | Cleanup | Cup Character |
|---|---|---|---|---|
| French Press | Easy | Low | Moderate | Full body, rich mouthfeel |
| Pour-over | Moderate | Low | Easy | Clean, bright, nuanced |
| Automatic drip | Easy | Medium | Easy | Balanced, consistent |
| AeroPress | Easy | Low | Easy | Smooth, versatile |
For most beginners, the French press offers the fastest path to a satisfying cup. It tolerates a slightly off grind and requires no pouring skill. Once you can consistently produce a good immersion brew, transition to pour-over to explore the brighter, more delicate flavors that paper filtration reveals.
Troubleshooting by Taste: Fixing Common Brewing Mistakes
Your palate is the best diagnostic tool you own. Sour, sharp flavors indicate under-extraction, fix by grinding finer, using hotter water, or extending brew time. Bitter, drying flavors indicate over-extraction, grind coarser, cool the water, or shorten contact time.
A hollow, weak cup usually means the ratio is off, so increase your coffee dose. Muddy sediment in a pour-over points to too fine a grind or excessive agitation. If the coffee tastes flat despite correct technique, the beans are likely stale, check the roast date and buy smaller quantities more frequently.
Conclusion: Your Daily Specialty Coffee Ritual
The difference between ordinary coffee and a specialty cup at home is not mystery, it is method. Fresh beans, a consistent ratio, correct grind size, and proper water temperature will produce coffee that rivals any cafe. The Gilded Cafe' Co. supports this ritual with small-batch roasted beans delivered directly to your door. Pair your daily pour with The Gilded Café White Glossy Ceramic Mug to complete the experience. Explore brewing resources and freshness guides

Get started with The Gilded Cafe' Co. and turn your morning brew into a moment of genuine luxury.
Frequently Asked Questions
How is specialty coffee different from regular coffee?
Specialty coffee scores 80 points or higher on the Specialty Coffee Association's 100-point scale. This rating reflects beans grown at high altitudes, picked at peak ripeness, and processed with care. Unlike commercial coffee, you can usually trace specialty beans to a specific farm or region. The difference shows up in the cup: brighter acidity, complex tasting notes, and a cleaner finish. Starting with high-quality beans makes the brewing steps that follow much more forgiving.
What is the ideal water temperature for brewing specialty coffee?
Aim for water between 195°F and 205°F (90°C to 96°C). Water that's too hot burns the grounds and creates bitter, over-extracted flavors. Water that's too cool produces sour, weak, under-extracted coffee. If you don't have a kettle with temperature control, bring water to a boil and let it sit for 30 to 45 seconds before pouring. This simple adjustment is one of the quickest ways to improve your cup.
Why is a burr grinder essential for brewing specialty coffee?
A burr grinder crushes beans between two abrasive surfaces, producing uniform particles. Blade grinders chop beans unevenly, creating both fine dust and large chunks. That inconsistency means some coffee extracts faster than the rest, leaving you with a bitter and sour mix in the same cup. Uniform grounds allow for even extraction, which is the foundation of a balanced brew. It's the single most important upgrade for anyone learning how to brew specialty coffee at home.
What is the 15-15-15 rule for coffee?
The 15-15-15 rule refers to the popular 1:15 coffee-to-water ratio: 15 grams of coffee for every 225 grams (about 225 ml) of water. Many beginners find this ratio a reliable starting point for pour-over and immersion methods. It produces a balanced cup with enough strength to highlight tasting notes without becoming overwhelming. Adjust from there based on your preference, using more coffee for a bolder cup or less for a milder one.